How To Add Flying Flash Twitter Bird to Your Blog

1.Login to your Bogger Dashboard and go to Design >> & Page Elements.
2.Click on 'Add a Gadget' on the sidebar.
3.Select 'HTML/Javascript' and add the one of code given below
Note: Replace bloggertoolz with your twetter account name
4. Now Click on Save "Html Java Script" and You are done..
Cheers
Source
1.Login to your Bogger Dashboard and go to Design >> & Page Elements.
2.Click on 'Add a Gadget' on the sidebar.
3.Select 'HTML/Javascript' and add the one of code given below
<object type="application/x-shockwave-flash" data="http://www.buzzbuttons.com/BUTTON6/twitbutton.swf" width="180" height="80"><param name="movie" value="http://www.buzzbuttons.com/BUTTON6/twitbutton.swf"></param><param name="allowscriptaccess" value="always"></param><param name="menu" value="false"></param><param name="wmode" value="transparent"></param><param name="flashvars" value="username=bloggertoolz"></param><a href="http://www.gamblinginsider.ca" title="gambling">gambling</a><embed src="http://www.buzzbuttons.com/BUTTON6/twitbutton.swf" type="application/x-shockwave-flash" allowscriptaccess="always" width="180" height="80" menu="false" wmode="transparent" flashvars="username=bloggertoolz"></embed></object>
Note: Replace bloggertoolz with your twetter account name
4. Now Click on Save "Html Java Script" and You are done..
Cheers
Source
Stylish Numbered Page Navigation Widget with Colored Styles For Blogger

Numbered Page Navigation Widget is a JavaScript hack for blogger to easily navigate blogger pages. In this post i am giving stylish navigation with different colorful styles.
An error was found in some blogs and it is also fixed in this widget.
eg.hiding at top

How to Install this Widget on Blogger?
- Customize the following form
- Click on "Generate" Button
- Finally click On "Add To Blogger" Button
Add Numbered Page Navigation Widget With DIfferent Styles For Blogger / Blogspot
Page navigation widget for blogger is most popular widget, and almost all bloggers are using this. as these widgets are only provided in wordpress blogs or hosted blogs.But now his hack has been made available in bloggers also
Here is I am giving this Page Navigation Widget with Different styles, and full Customization options
Install This Widget On 'Blogger':-
1. Customize Options bellow and Click on Generate button
2. Finally Click Add to Blogger button to add this widget on your Blog
For further help and customization of this widget, please leave a comment or Contact us, I will reach you as soon as possible.
Some Stylings and PageNavi Script by Abu Farhan. Widget Form by Me
Beautiful Page Navigation Widget for Blogger/Blogspot
Page numbered navigation widget for blogger is very beautiful widget to navigate blogspot pages very easely and looking feel good. All navigation widgets are based on JavaScript (this also). you can use this widget very easily and simple installation then others.
Let's see:-
Install this:-
Just click Add to Blogger Button
#Note:Don't put widget Title
Manual Installation:-
1. Login To Your Blogger And Go To Design Section
2. Then Click On Edit/Html
3. Now search for </body> and place the below codes before it.
#var pageCount=5; ~ Number of posts per page
Save template and Check your Blog
#Want any Help or difficult to installing widget can surely contact me via Comments Or ContactUS
How to Create Google+ (Plus) Fan Page for Your Blog
Google+(Plus) Launches Pages For Google +(Plus). A Businesses solution for Promoting products and sharing news, photos and events, to your customers and Fans. it is very similar to the Facebook Fan Pages. in this Article i show you how to Create and Promote a Fan Page for your Blogger Blog.
That's it!. Please leave your comments.
Add Smooth Scroll to Top Button with Jquery to Blogger / Blogspot
How to Add Smooth Scroll to Top button with Jquery plugin, I already given a Scroll to Top widget with Jquery and CSS. here i am giving another type of Smooth scroll to Top Widget with Jquery.
But in this plugin the Scrolling Starts from bottom with a Certain speed and it Ends with Gradually Decreases the speed. this effect is looks more attractive.
Demo
Step 1: Adding Jquery JavaScript Plugin
a. Go to Blogger Dashboard < Design tab > Edit Html
b. Search for </head> tag
c. Add below line of code Before </head> tag
Step 2: Adding Scroll to Top Script
a. Go to Blogger Dashboard < Design tab > Edit Html
b. Search for </head> tag
c. Add below section of code Before </head> tag and Save your Template.
You Are Successfully Done!
Add Fresh and Beautiful Search Boxes to Blogger / Blogspot
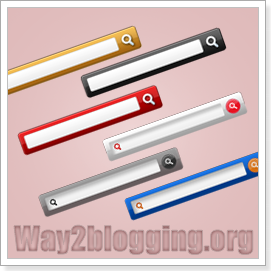
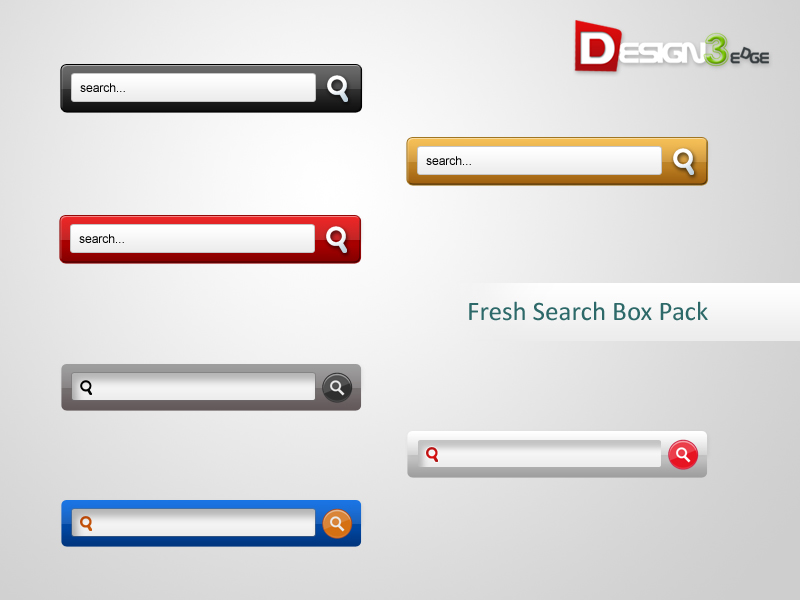
Fresh and Beautiful Search boxes to your blogger blogs. i given a simple search box widget. here i giving six beautiful and fresh search box to you. Actually these are PSD source designed by Design3edge. i am converted to Blogger for you. hope you enjoyed with this!.
See the Screenshot of PSD source:-
a. Login to Blogger Dashboard -> Design tab -> Page Elements .
b. Click on Add a Gadget where you wish to place Search Box.
c. Choose HTML/JavaScript from the List.
d. Place any one Search Box code in to it and Save the Gadget.


Subscribe to
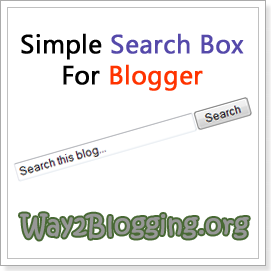
Hi Friends! Add a Simple Search box to Blogger Blog. most of custom templates has comes with no search box, here is the simple Search box for you. just add it with a single click and enjoy!
Demo
Use the Below Code and Add the Widget as HTML/JavaScript
I will add some Cool Search boxes with Different Color Schemes, SO Keep Updated... By follow me @
How to Add Official Google +1 Button to Blogger / Blogspot

Google Released their another Official New +1 Button for websites and Blog. when you +1 the any page form Web, this will gives that the webpage recommend to your friends and contacts in Gmail. While your friends Searching on Google, your Recommendation will be visible as in Search Result(s).
One of My Friend Paul Crowe (Admin of spiceupyourblog.com), He +1 a page on his Blog
Now I am Searching for "twitter follow button for blogger" in Google.
then i see a +1 recommendation form Paul Crowe in the Search Results.
this means he saying this is Best Stuff. :)

Watch this Video for Better Understand of +1 Button

to Enable this button
a. Go to Blogger Dashboard > Design Tab > Page Elements
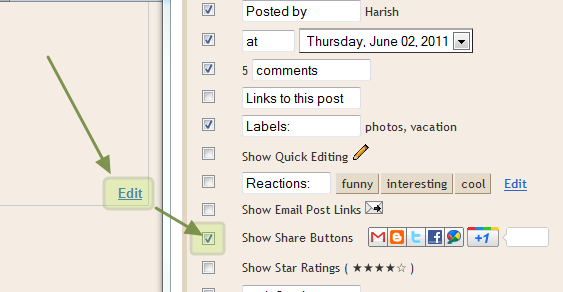
b. Edit Blog Posts and tick the Show Share Buttons checkbox and Save it!
Demo :-
b. Click on Expand Template Widgets checkbox
c. Find for
d. Paste the Below +1 Button Script Code Before it! and Save your Template.
Use the Below Widget Code Generator Form, Generate a Widget Code and Copy it!
Now Find for
Paste the Coppied Code Before or After it! and Save your Template.
- if you put the code Before
- if you put the code After
- if you put the code both Before and After
Drop Your Comments :)
How to Add Official Twitter Follow Button to Blogger Blog
Twitter Follow Button is Twitter Official button released, and is very similar to Retweet button but here it is Follow button with Single Click to follow on Twitter. there is another options included to show the Number of Followers in our Twitter accounts. The Button Comes with 9 Languages.
Demo :-
On Light Background
On Dark Background
2. There you will see a Form for you. Fill it with Required data!
3. on right side, Copy the Widget Code
b. click Add a Gadget on Sidebar
c. Choose HTML/JavaScript, Paste the Copied code and Save it!
b. Click on Expand Template Widgets checkbox
Find for
c. Paste the Coppied Code Before or After it! and Save your Template.
- if you put the code Before
- if you put the code After
How to Display Scripts and Codes in Blogger Posts

How to display the Scripts and Codes in blogger post To show codes in blogger post in special section.
Suppose we want to show a simple code like bellow
<h1> Related posts </h1>
but it is HTML Code so it will display like bellow
To avoid this we show codes in special Section amd make it friendly to post
Just follow these steps
Now save your template.
While creating any Post, If you want to show the special Code in post that CSS code or JavaScript code, what ever may be , Go to Edit HTML tab in Post and create Div section and put your code in Div section like bellow and publish Your Post
Note:- Before Putting code, Make it Friendly to post Using these tools
a sample preview
Want any Help Ask me via comments and leave your responses
How To Add Animated Flying Twitter Bird Widget For Blogger / Blogspot

Animated Flying Twitter Bird Widget For Blogger. The bird flying animated effect by JavaScript Hack and when you scroll the page Up or Down, twitter bird will come in front of your page. The bird found itself as the "follow me" link on the Twitter account. If you move the mouse pointer over the bird, a "follow me" button and a "tweet this" button displayed. Based on Tweet this link I am divided this widget into Two types.
1.Tweet this Button with Unique tweet text in all your Blog pages {i.e, tweet text contains That you have Chosen}
2.Tweet this Button with Multiple tweet text in All Your Posts Pages{i.e, tweet text contains your Post title and Post Url}
Your Twitter Account User Name* :
Add Animated Flying Twitter Bird Widget to Blogger Blogs (Updated)

Flying Twitter Bird widgets for blogger, in my previous post i give this awesome widget and i am getting spectacular response from you. previously, the twitter bird has two types based on tweet text.
one is unique tweet text that you choose like "Blogger Widgets and Tricks - http://www.way2blogging.org" for all pages
and Second one is tweet text contains post title and post url, just like "How To Add Animated Flying Twitter Bird Widget For Blogger / Blogspot - http://www.way2blogging.org/2011/01/how-to-add-animated-flying-twitter-bird.html"
Now i am giving another type, that is tweet text contains Current page title and Url, and is visible in all pages of your blog, for suppose you are in label page then the tweet text contains Label Name and URL
Your Twitter Account User Name* :
That's All!
How To Add Tweet this (Twitter) button to Each Blogger Post

Hi friends “Tweet this” button will enable your readers to share your post with other Twitter users. This will help promote your blog and possibly increase your Twitter followers.
This button will appear at the bottom area of each post.
How to add Tweet this button to each blogger post:-
Note:Backup your template first
Save your template and test it once for good working or not
#You can change tweet this button with yours
Click here to download more tweet this buttons
How to Add Wordle Type Flash Label Cloud (FatColud) Widget For Blogger / Blogspot

Hi! Firstly, I wishing You a very Happy New Year. Yes,a new blogger widget in front of you. Have you seen Wordle word Cloud? This widget is similar to Wordle word cloud called as FatCloud. With this widget You can show your labels as wordle word cloud in Different formats. This Widget is Flash based and it Generates Label Cloud(FatCloud) automatically.
It includes Different types of Fonts, Differenttypes of text Angle and Color Schemes with Custom design also, so that you can Design your Label Cloud differently
I include all options in this widget. See a screen-shot bellow
More screen shots for You
Screen Shot 1, Screen shot 2, Screen Shot 3, Screen Shot 4, Screen Shot 5, Screen Shot 6, Screen Shot 7
Above code is not visible in all templates because of change in Class or Id. For suppose If a template having two sidebars of Right and Left, then Class or Id is changed to sidebar-left ,sidebar-right, sidebar-wrapper-left and like so...
And Finally add Generated Widget Code just After it And Save your template

This Article is licensed under a Creative Commons Attribution-NonCommercial-ShareAlike 2.5 India License.
Flash Animated Label Cloud Widget For Blogger - Blogspot

Flash Animated Label Cloud Widget(Blogumus) for blogger was awesome widget to show blogger labels in alternatively. This widget is Designed for Word Press, and Now it is available for Blogger.
With this widget we access label tags randomly by your mouse over the Flash object to see the animation begin, the labels are animated around Sphere. I am giving highly customized options for this widget.
I think Using & installing this widget very easily for You. Take a look of this Widget
Now I will Explain How to Use this widget for blogger
Note:- Back Up Your Template before Going to do this for safety
First Customize values bellow and Generate Widget Code
Login to Blogger account
Goto Design section > Edit HTML
Search Bellow Tag
Add Generated Widget Code Just after it
Now save your template And check your blog
Video Tutorial : How to Install Flash Animated Label Cloud Widget on Blogger Blog ?
Any difficult to use or install this widget You can surely contact via Comments or Contact US For Help
How to Add Facebook Share Count Buttons to Blogger Blogs

Hello Friends! Today i going to teach you how to add different types Facebook share count buttons to blogger blog. i think all you know about share count buttons. I am not added any tutorial about Facebook and i will give you some more cool widget for promote Facebook.
You just add it in simple 4 easy Steps.
First : Generate widget code using below form.
Second : Go to Blogger Dashboard > Design > Edit HTML
Third : Click on Expand Template Widgets checkbox and Search for <data:post.body/>
Fourth : Place the Copied Widget code Before or After it!
- if you put the code Before <data:post.body/> tag then it will appear at the top of the post
- if you put the code After <data:post.body/> tag then it will appear at the Bottom of the post
How to Add Retweet Button to Each Blogger Post

Add retweet button to each Blogger post, Retweet button for blogs and websites which enables easily tweet their content on twitter. If you have useful content in your blog, other twitter users retweet your content to their twitter will increase your blog traffic also.
Tweeting of blog post to twitter as your post content with URL of post. These buttons make tiny your URLs. I am giving all collections of retweet buttons
Here is giving different types of Retweet buttons with Codes
Grab any one code that you like and Replace it
with in Above.
Save Your Template
For Further Help you can Contact me via Comments.
Add Social Sharing/Bookmarking Widget with Cool Hover Effect

Social sharing / bookmarking widget with Cool Gray-scale/Color hover widget to Blogger blog. i have given a beautiful sharing widget with css/jquery. This widget is used by me in way2blogging.blogspot.com with CSS. After moving to .Org domain name, i change the Template.
Here i am giving that widget and added a cool hover effect with CSS3 for you. If you like it then you can use in your blog :)
Live Demo:-
1. Login to Blogger Dashboard > Design tab > Edit Html
2. Click on Expand Template widgets ckeckbox
3. Search for
Step 2: Adding Widget Code
1. Search for
2. And Put Below Code immediately after it! & Save your Template
This Problem comes when we install Auto Read Hack in our Blogs
For this Problem Search for any one line from below and Put Above Section of Wdget Code after it!
Thank you for All your Info & Support
Add Sexy Auto Hide Social Bookmarking Widget for Blogger

How to add sexy auto hide Social bookmarking widget, using this widget your readers share or bookmark the post on several social networking sites. This is also increases SEO by sharing. it is embedded bellow on each and every post page so that ease in using.
*Note:- Change your Feedburner URL(http://feeds2.feedburner.com/WAY2BLOGGING) with Yours
Save your template
Further Changes: If you want to show this widget only on post page then add bellow code
These Conditional tag will allow this widget only on post page to show.
Now You are Done!
Add Yahoo Smiley Emoticons Above Blogger / BlogSpot Comment Form

Yahoo smileys on blogger comments. Yahoo smileys are Now available in blogger comments. Using with a simple JavaScript Hack, smiley characters are replaced with Yahoo Smiley images. I used yahoo smileys in Yahoo emotions site and implemented this script. I changed some smiley characters for our requirement. You can try this in bellow comments form.
1.Adding CSS Code
2.Adding Html Code
3.Adding Javascript
b. Click on Expand Widgets tick box
c. Search for
You are done!
How To Provide Code for Other Bloggers to Link to your Blog
Your blog will increase in Page Rank when more and more bloggers link to your blog. Hence to gain more backlinks to your blog provide code for others to copy and paste into their blog template.
You can provide code for only a simple link or for an image link. The advantage with a link is you can specify what anchor text you want in the link. The search engines place a lot of importance on anchor text for indexing blogs.
CODE FOR BUTTON LINK
To provide an image link you will first have to create a button image. Just Google for "button generator". Go to any of these sites and create a button image. Here is one I made for this site : After creating the button upload it to a free host like Photobucket.com or Googlepages and copy down the link to the image. Paste it in a Notepad file for inserting it into the code as shown below.
To put the code in your sidebar login at Blogger.com and click on Layout link on Dashboard. Then click on Add Page Element link at top of sidebar. Choose the Html/Javascript option and paste the following code in the contents window and save :
<p>To link to this blog, copy and paste the code below into your site.</p>
<textarea rows="4" cols="24" style="font-size: 1.1em;" readonly="readonly" onclick="this.select();"><a href="BLOG_URL"><img
src="LINK OF IMAGE" alt="BLOG_DESCRIPTION" /></a></textarea>
Replace the CAPS with the relevant data for your blog. For this blog it will look like this :
+++++++++++++++++++++++++++++++++++
To link to this blog, copy and paste the code below into your site.
++++++++++++++++++++++++++++++++++++
This will give an image link to your blog like this after a blogger pastes the above code in his blog.
++++++++++++++++++++++++++++++++++++
CODE FOR A TEXT LINK
The code for a text link is :
<p>To link to this blog, copy and paste the code below into your site.</p>
<textarea id="b_2" rows="4" cols="24" style="font-size: 1.1em;" readonly="readonly" onclick="this.select();"><a href="BLOG_URL">BLOG_TITLE</a></textarea>
Replace the CAPS with your Blog URL and Blog Title. It will look like this :
+++++++++++++++++++++++++++++++++
To link to this blog, copy and paste the code below into your site.
How to Host Your Blog Scripts and Files on DropBox for Free

In this Tutorial I show you How to Host your scripts and files online with a Direct hotlink to your files. till now we are using the Google sites, Google Code or some other Free host's like FileDen, OpenDrive, Fileave, RipWay etc,. These free hosts are Giving Good features but our need is Bandwidth(Data Transfer Limit). DropBox are Providing us with 2GB hosting with 10GB/Day Bandwidth, and also we can get direct hot link to your files by Public sharing.
2. By Online Uploading via DropBox site.
in this tutorial i will give you the Two ways, Step By Step.
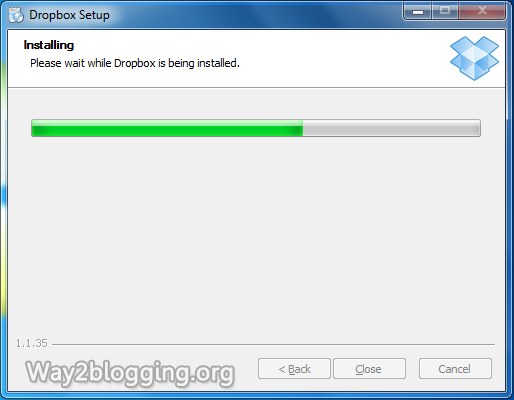
Step 2: Click Install button in DropBox Setup pop up window and Wait Until the software completes Installation.

Step 3: After Completing installation, DropBox Setup opens another popup window for account settings. if you not have DropBox account, then choose I don't have DropBox account and click Next Button.

Step 4: Fill the fields with Required data and Click Next button

Step 5: Choose 2 GB Free account and Click Next button

Step 6: Choose Typical settings and Click Install button

Step 7: a PopUp window opens for DropBox tour, click the Skip tour Button.

Step 8: Finally Click the Finish Button to Close the DropBox Setup.

Step 9: DropBox folder Opens automatically, If not then click the DropBox icon in the Taskbar.

Step 10: In DropBox folder open the Public folder, and paste your scripts or files in the Public folder.

Step 11: For getting Direct Link to you script or file, right click on the File --> go to DropBox --> Click the Copy Public Link
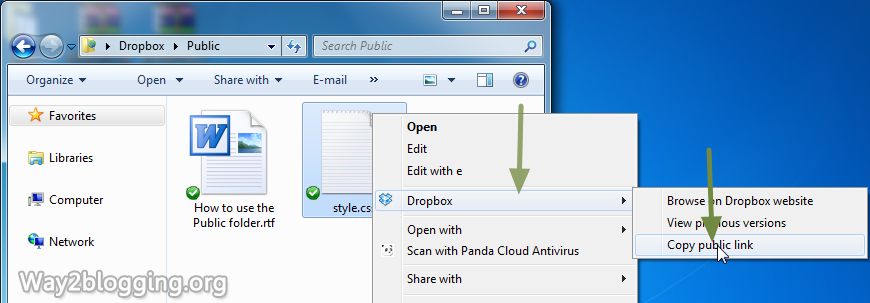
Your public links looks like
Step 2: Click on Files tab --> Open the Public Folder by Clicking on Public.

Step 3: Click on Upload Button.

Step 4: an Inline Pop-Up window opens, click on Choose Files button.

Step 5: Select the Files that you want to Upload / Host and Click Open Button.

Step 6: Click Start Upload button to Upload your files

Step 7: After Completes Uploading, click the Uploaded file to open the Drop Menu options, and then Choose the Copy Public Link Option.

Step 8: Click the Copy to Clipboard button to copy the Direct Link to your Clipboard.

How To Host Javascript Or .js files on Blogger Itself
How To Host Javascript Or .js files on Blogger, yes as blogger supports javascript which makes blogger support all the possible hacks in this platform, where to host this javascript on blogger.The Problem we all face is getting an free server with unlimited bandwidth to host these javascripts. As blogger doesn't provide any source to host javascript for blog like it has provided picasa for images.As of before we all were using googlepages to upload the .js files but google closed this service and switched to google sites.As still we can upload these .js files to google sites but just upload it with file extension .txt instead of .js .OR we can upload .js files to Google Code
The best solution to host your javascript on blogger itself
For External Javascript the code is
Whenever you are trying to implement some hack making use of javascript you would have mostly been asked to download the .js file and upload to your own server,get its url and then replace it with red link in above codes shown above,and then place the whole above codes in blogger html before closing of head tag.
So why don't we upload these javascripts to blogger itself.Just what you have to do is,whenever you are asked to do this kind of above stuff while implementing any hack.
Just use below code in place of above one.
Just in place of "<--Paste all code here from .js file -->" line in above code what you have to do is just open the .js file (which you are asked to download or upload to your own server) in notepad or on your browser , copy its code and paste it in place of above red line.And your javascript codes are now ready which are now hosted on blogger itself instead of hosting to third party server.
Host your Image on Blogger for Free with Unlimited Bandwidth

Hosting your Images on Blogger with Unlimited Bandwidth for Free!. There are so many Free image hosting sites online.Some of the most popular sites include Imageshack, Photobucket, Tinypic, Flicker, Picasa, etc.. But they all have Limited Features, Like a Limited number of uploads, Image size Limits, Less Speed and especially bandwidth limits. Here, we are on the blogger platform, Blogger give free image hosting with unlimited bandwidth. All we need to know is how to upload the images to blogger.But some Bloggers are facing problems while getting the hotlink image URL to their images.This tutorial covers image uploads and will also be useful for some of my upcoming Great Tutorials.
Step 1: Login to Blogger Dashboard -> Click on NEWPOST button
Step 2: Click the Compose tab --> Click on Insert Image icon( )
)

Step 3: Click the Choose Files button

Step 4: Select the Files and Click the Open Button

Wait for a while till the image is finished uploading.
Step 5: Select the Uploaded image and Click the Add Selected button.

The Uploaded Image Looks like the Below

Step 6: Click on the Edit HTML tab

Step 7: you will see the two image Urls, but u pick Original image Url after the

Use the image any where you want with unlimited bandwidth.
If you upload the two or more images at once you will get the urls after the

this is a small tutorial about Blogger images upload and in upcoming tutorial i will give you the Most wanted tips and tricks about blogger images, those are very simple and every Blogger should must know it.
Beautiful Page Navigation Widget for Blogger/Blogspot
Page numbered navigation widget for blogger is very beautiful widget to navigate blogspot pages very easely and looking feel good. All navigation widgets are based on JavaScript (this also). you can use this widget very easily and simple installation then others.
Let's see:-
Install this:-
Just click Add to Blogger Button
#Note:Don't put widget Title
Manual Installation:-
1. Login To Your Blogger And Go To Design Section
2. Then Click On Edit/Html
3. Now search for </body> and place the below codes before it.
<style type="text/css">
.showpageArea{
padding:10px;
color : #003366;
text-align : left;
width : 100%;
}
.showpageArea a {
float:left;
background:url(https://blogger.googleusercontent.com/img/b/R29vZ2xl/AVvXsEiC3bmxzx8-1a6-2N55KJPqltyyoETjQqx6kJm1sQ0X_eMxzM38hyNpt-AeURmmluxbemvAGNj03gX-ieff7YHXAWShQHLXZZcFWQ2JIJqDOu7lM9eFy0A1DekgeAQqzRsWX6uDowS4BgBQ/) no-repeat 0 0;
text-align : center;
width : 127px;
height : 42px;
text-align : center;
display : block;
margin : 0 5px;
color : #333;
padding-top : 6px;
}
.showpageArea a:hover {
color : #333;
margin : 0 5px;
padding-top : 6px;
}
.showpageOf{
float:left;
padding-top : 6px;
}
.showpageNum a {
background : url(https://blogger.googleusercontent.com/img/b/R29vZ2xl/AVvXsEir1SNjWHkOezNFzvVz2Bijn1xJbw8zDuL14SH0F7oJa7ZGtTy3pCONZKFb5y04hitVH9ekQVmG6Co-gXoTSa1BmitnMZJ6aV8-lHPyfC1MbEEozvC3_2CK2aEGpbYnNWxmXna9ifuIfY69/) no-repeat 0 0;
width : 37px;
height : 42px;
display : block;
text-align : center;
float : left;
margin : 0 5px;
padding-top : 6px;
text-decoration : none;
color : #333;
}
.showpageNum a:hover {
background : url(https://blogger.googleusercontent.com/img/b/R29vZ2xl/AVvXsEir1SNjWHkOezNFzvVz2Bijn1xJbw8zDuL14SH0F7oJa7ZGtTy3pCONZKFb5y04hitVH9ekQVmG6Co-gXoTSa1BmitnMZJ6aV8-lHPyfC1MbEEozvC3_2CK2aEGpbYnNWxmXna9ifuIfY69/) no-repeat 0 100%;
color : #fff;
}
.showpagePoint {
background : url(https://blogger.googleusercontent.com/img/b/R29vZ2xl/AVvXsEir1SNjWHkOezNFzvVz2Bijn1xJbw8zDuL14SH0F7oJa7ZGtTy3pCONZKFb5y04hitVH9ekQVmG6Co-gXoTSa1BmitnMZJ6aV8-lHPyfC1MbEEozvC3_2CK2aEGpbYnNWxmXna9ifuIfY69/) no-repeat 0 100%;
width : 37px;
height : 42px;
display : block;
float : left;
text-align : center;
margin : 0 5px;
padding-top : 6px;
font-weight : bold;
color : #fff;
}
.showpageNum a:link, .showpage a:link {
text-decoration : none;
color : #cc0000;
}
</style>
<script style='text/javascript'>
var pageCount=5;
var displayPageNum=1;
var upPageWord="Previous";
var downPageWord="Next";

</script>
<script type='text/javascript' src="http://bloggerblogwidgets.googlecode.com/files/BeautifulPageNavi.js"/>#var pageCount=5; ~ Number of posts per page
Save template and Check your Blog
#Want any Help or difficult to installing widget can surely contact me via Comments Or ContactUS
How to Create Google+ (Plus) Fan Page for Your Blog
Google+(Plus) Launches Pages For Google +(Plus). A Businesses solution for Promoting products and sharing news, photos and events, to your customers and Fans. it is very similar to the Facebook Fan Pages. in this Article i show you how to Create and Promote a Fan Page for your Blogger Blog.
How to create a Google+ Fan Page?
You Must Have a Google+ Account to create a G+ Fan Page
- Go to THIS PAGE and Click on Product or Brand
- Enter the Blog Title and URL as Follows
- Select the Category as WebSite
- Tick the Agree Page Terms check-box and Click on Create Button.
- Enter the Tagline of the Blog and Upload a Profile photo (if any!)
- Your G+ page is almost created. if you wish to share your page with your Google+ Circles, then click the Share on Google+ button and Finally Click the Finish button


Adding Official Google+(Plus) Page Badge
To Grow your fans and Audience, add the official Google+ page badge to your blog.- After finishing creating page, you will see the page like below. click the get the Badge link.
- You will redirect to this page. and your Google + page ID is automatically added.
- Choose a Style of Badge and Language (Leave the Advanced options to Default).
- Here, you will get Two sections of Code.(Code1 and Code2).
- Go to Blogger Dashboard > Design > Edit HTML
- Search for the
</head>tag
- Add the Code1 section before
</head>tag and Save the Template
- Add the Code2 section in HTML/JavaScript gadget or place where you want the badge to be appear.


That's it!. Please leave your comments.
Add Smooth Scroll to Top Button with Jquery to Blogger / Blogspot
How to Add Smooth Scroll to Top button with Jquery plugin, I already given a Scroll to Top widget with Jquery and CSS. here i am giving another type of Smooth scroll to Top Widget with Jquery.
What is Difference Between Previous and Present Plugins?
In previous Plugin, the Scrolling Starts from bottom with a Certain speed and Maintains Same speed till to reach top of web pageBut in this plugin the Scrolling Starts from bottom with a Certain speed and it Ends with Gradually Decreases the speed. this effect is looks more attractive.
Demo
Scroll this page to Bottom and See Demo at bottom right
How to Add Smooth Scroll to Top with Jquery ?
there are 2 Simple StepsStep 1: Adding Jquery JavaScript Plugin
a. Go to Blogger Dashboard < Design tab > Edit Html
b. Search for </head> tag
c. Add below line of code Before </head> tag
<script src="https://ajax.googleapis.com/ajax/libs/jquery/1.6.1/jquery.min.js" type="text/javascript"></script>Step 2: Adding Scroll to Top Script
a. Go to Blogger Dashboard < Design tab > Edit Html
b. Search for </head> tag
c. Add below section of code Before </head> tag and Save your Template.
<style type="text/css">
#w2btoTop {display:none;text-decoration:none;position:fixed;bottom:10px;right:10px;overflow:hidden;width:51px;height:51px;border:none;text-indent:-999px;background:url(http://2.bp.blogspot.com/-oVa1ImctF7c/Tdouv3K7NyI/AAAAAAAAA38/xT4bu8uKM3M/way2blogging.org.ui.totop.png) no-repeat left top;}

#w2btoTopHover {background:url(http://2.bp.blogspot.com/-oVa1ImctF7c/Tdouv3K7NyI/AAAAAAAAA38/xT4bu8uKM3M/way2blogging.org.ui.totop.png) no-repeat left -51px;width:51px;height:51px;display:block;overflow:hidden;float:left;opacity: 0;-moz-opacity: 0;filter:alpha(opacity=0);}

#w2btoTop:active, #w2btoTop:focus {outline:none;}
</style>
<script src="http://bloggerblogwidgets.googlecode.com/files/w2b_jquery.ui.totop.js" type="text/javascript"></script>

<script type="text/javascript">
$(document).ready(function(){ $().UItoTop({ easingType: 'easeOutCubic' }); });
</script>
You Are Successfully Done!
Add Fresh and Beautiful Search Boxes to Blogger / Blogspot
Fresh and Beautiful Search boxes to your blogger blogs. i given a simple search box widget. here i giving six beautiful and fresh search box to you. Actually these are PSD source designed by Design3edge. i am converted to Blogger for you. hope you enjoyed with this!.
See the Screenshot of PSD source:-
How to Add Beautiful Search Boxes to Blogger
a. Login to Blogger Dashboard -> Design tab -> Page Elements .
b. Click on Add a Gadget where you wish to place Search Box.
c. Choose HTML/JavaScript from the List.
d. Place any one Search Box code in to it and Save the Gadget.
Style 1
<style type="text/css">

#w2b-searchbox{background:url(https://blogger.googleusercontent.com/img/b/R29vZ2xl/AVvXsEgW3dIDwbL4z9JfAz_Vq857A3KYK5ICr8VxrZciGHIS5RSIYp45Iz6QynNn6DrV0NVe_MjtwnbsS_Fny_T2U_EyMyG_GTMBRpupdy98oSbbCUNXsfw67b92_CsF2d8R6fNToZPLQ6cramn-/) no-repeat scroll center center transparent;width:307px;height:50px;disaply:block;}

form#w2b-searchform{display: block;padding: 10px 12px;margin:0;}

form#w2b-searchform #s{padding: 6px;margin:0;width: 235px;font-size:14px;vertical-align: top;border:none;background:transparent;}

form#w2b-searchform #sbutton{margin:0;padding:0;height:30px;width:30px;vertical-align: top;border:none;background:transparent;}

</style>
<div id="w2b-searchbox">
    <form id="w2b-searchform" action="/search" method="get">

        <input type="text" id="s" name="q" value="Search..." onfocus='if (this.value == "Search...") {this.value = ""}' onblur='if (this.value == "") {this.value = "Search...";}'/>

        <input type="image" src="http://img1.blogblog.com/img/blank.gif" id="sbutton" />

    </form>
</div>
Style 2
<style type="text/css">
#w2b-searchbox{background:url(https://blogger.googleusercontent.com/img/b/R29vZ2xl/AVvXsEhXn0Ni4mtSy1eoExAuMLVzndRhnJ4imIRE1WU20aPkVr1PuKod4oFDmQLuhotxA0u13_WUvKk5nNdW_PmBZNp6u4y-u2DfRL66GauewmGgdS9P1_T_PNvjwuY4qzFL24k_D8j29bMDMDmj/) no-repeat scroll center center transparent;width:307px;height:50px;disaply:block;}

form#w2b-searchform{display: block;padding: 10px 12px;margin:0;}

form#w2b-searchform #s{padding: 6px;margin:0;width: 235px;font-size:14px;vertical-align: top;border:none;background:transparent;}

form#w2b-searchform #sbutton{margin:0;padding:0;height:30px;width:30px;vertical-align: top;border:none;background:transparent;}

</style>
<div id="w2b-searchbox">
    <form id="w2b-searchform" action="/search" method="get">

        <input type="text" id="s" name="q" value="Search..." onfocus='if (this.value == "Search...") {this.value = ""}' onblur='if (this.value == "") {this.value = "Search...";}'/>

        <input type="image" src="http://img1.blogblog.com/img/blank.gif" id="sbutton" />

    </form>
</div>
Style 3
<style type="text/css">

#w2b-searchbox{background:url(https://blogger.googleusercontent.com/img/b/R29vZ2xl/AVvXsEitYtuevlWdwwLzmv5fkMCMbbmnipO2TWJZB6VVxU1II-A4qFdTacEqRbB0xZWdsdFWN0PCNuCZ7eeWf-emjDi5263TPULMcwPoZXAGoEtUBJOrmq8bIeC1ugd8iah73hErdF76suTwKzmX/) no-repeat scroll center center transparent;width:307px;height:50px;disaply:block;}

form#w2b-searchform{display: block;padding: 10px 12px;margin:0;}

form#w2b-searchform #s{padding: 6px;margin:0;width: 235px;font-size:14px;vertical-align: top;border:none;background:transparent;}

form#w2b-searchform #sbutton{margin:0;padding:0;height:30px;width:30px;vertical-align: top;border:none;background:transparent;}

</style>
<div id="w2b-searchbox">
    <form id="w2b-searchform" action="/search" method="get">

        <input type="text" id="s" name="q" value="Search..." onfocus='if (this.value == "Search...") {this.value = ""}' onblur='if (this.value == "") {this.value = "Search...";}'/>

        <input type="image" src="http://img1.blogblog.com/img/blank.gif" id="sbutton" />

    </form>
</div>
Style 4
<style type="text/css">

#w2b-searchbox{background:url(https://blogger.googleusercontent.com/img/b/R29vZ2xl/AVvXsEj-huqW0jTl2FnJFk7gq9fvxVsmW3AX2dCuR8w_u3VZm4O3ihyphenhyphen8zhyqaNFZCUVHdlRUSV4CZTn52vfo9UEumQ2CpZAZ5HqZKgVcrxWTxA-B6VYHMeT8FYlLIVoVeqUW9cVqaiPF8Q5TuhzH/) no-repeat scroll center center transparent;width:307px;height:50px;disaply:block;}

form#w2b-searchform{display: block;padding: 12px;margin:0;}

form#w2b-searchform #s{padding: 6px 6px 6px 26px;margin:0;width: 215px;font-size:14px;vertical-align: top;border:none;background:transparent;}

form#w2b-searchform #sbutton{margin:0;padding:0;height:30px;width:30px;vertical-align: top;border:none;background:transparent;}

</style>
<div id="w2b-searchbox">
    <form id="w2b-searchform" action="/search" method="get">

        <input type="text" id="s" name="q" value=""/>

        <input type="image" src="http://img1.blogblog.com/img/blank.gif" id="sbutton" />

    </form>
</div>
Style 5
<style type="text/css">

#w2b-searchbox{background:url(https://blogger.googleusercontent.com/img/b/R29vZ2xl/AVvXsEhKa4Q7ZXf3OrhuYs74Qc_oKowaUFGq-Bcc4TnnuRv7vG6J3F73-d-b4qo6SdGsLmjB0K3L1oOs5jZXm2CHzQzJQjhwh7h8TyAstrLDAZkvLK44q4kGJAKSnDK4TYSB9nz6Er1-vAeQdk8M/) no-repeat scroll center center transparent;width:307px;height:50px;disaply:block;}

form#w2b-searchform{display: block;padding: 12px;margin:0;}

form#w2b-searchform #s{padding: 6px 6px 6px 26px;margin:0;width: 215px;font-size:14px;vertical-align: top;border:none;background:transparent;}

form#w2b-searchform #sbutton{margin:0;padding:0;height:30px;width:30px;vertical-align: top;border:none;background:transparent;}

</style>
<div id="w2b-searchbox">
    <form id="w2b-searchform" action="/search" method="get">

        <input type="text" id="s" name="q" value=""/>

        <input type="image" src="http://img1.blogblog.com/img/blank.gif" id="sbutton" />

    </form>
</div>
Style 6
<style type="text/css">

#w2b-searchbox{background:url(https://blogger.googleusercontent.com/img/b/R29vZ2xl/AVvXsEixPpI0IVtCkZ3ioGhG-wHq09zapP4a6UtBHyefy6vjAu1c4syjxF9S3fDStpsweziO-VolpzSzfEOBB3KsOii4Qm7BQO8y9ik3Hgc5gCEwZQ4sw6EkO-LhgY5vfu8I6jSLYoZuxvP5zdTM/) no-repeat scroll center center transparent;width:307px;height:50px;disaply:block;}

form#w2b-searchform{display: block;padding: 12px;margin:0;}

form#w2b-searchform #s{padding: 6px 6px 6px 26px;margin:0;width: 215px;font-size:14px;vertical-align: top;border:none;background:transparent;}

form#w2b-searchform #sbutton{margin:0;padding:0;height:30px;width:30px;vertical-align: top;border:none;background:transparent;}

</style>
<div id="w2b-searchbox">
    <form id="w2b-searchform" action="/search" method="get">

        <input type="text" id="s" name="q" value=""/>

        <input type="image" src="http://img1.blogblog.com/img/blank.gif" id="sbutton" />

    </form>
</div>
Subscribe to
Hi Friends! Add a Simple Search box to Blogger Blog. most of custom templates has comes with no search box, here is the simple Search box for you. just add it with a single click and enjoy!
Demo
How to Install Search Box Widget?
Click The Bellow Button to add the widget directly to your blog(OR)
Use the Below Code and Add the Widget as HTML/JavaScript
<div class="searchform">
<form method="get" id="searchform" action="/search">
<table width="100%">
<tr>
<td><input type="text" style="width:98%;padding:2px;" value="Search this blog..." onfocus="if (this.value == "Search this blog...") {this.value = ""}" onblur="if (this.value == "") {this.value = "Search this blog...";}" name="q" id="sbox" class="sbox"></td>
<td width="75px"><input type="button" Value="Search" id="sbutton" class="sbutton" alt=""></td>
</tr>
</table>
</form>
</div>I will add some Cool Search boxes with Different Color Schemes, SO Keep Updated... By follow me @
How to Add Official Google +1 Button to Blogger / Blogspot
Google Released their another Official New +1 Button for websites and Blog. when you +1 the any page form Web, this will gives that the webpage recommend to your friends and contacts in Gmail. While your friends Searching on Google, your Recommendation will be visible as in Search Result(s).
One of My Friend Paul Crowe (Admin of spiceupyourblog.com), He +1 a page on his Blog
Now I am Searching for "twitter follow button for blogger" in Google.
then i see a +1 recommendation form Paul Crowe in the Search Results.
this means he saying this is Best Stuff. :)
Watch this Video for Better Understand of +1 Button
How to Add +1 Button to Blogger Posts
Blogger giving this button with Blogger Official Share buttonsto Enable this button
a. Go to Blogger Dashboard > Design Tab > Page Elements
b. Edit Blog Posts and tick the Show Share Buttons checkbox and Save it!
Demo :-
| Small | Medium | Standard | Tall |
How to Install +1 Button on Blogger Posts
a. Login to Blogger Dashboard > Design Tab > Edit HTMLb. Click on Expand Template Widgets checkbox
c. Find for
</head> tagd. Paste the Below +1 Button Script Code Before it! and Save your Template.
<script type="text/javascript" src="http://apis.google.com/js/plusone.js"></script>
Use the Below Widget Code Generator Form, Generate a Widget Code and Copy it!
Now Find for
<data:post.body/> tagPaste the Coppied Code Before or After it! and Save your Template.
- if you put the code Before
<data:post.body/> tag then it will appear at the top of the post- if you put the code After
<data:post.body/> tag then it will appear at the Bottom of the post- if you put the code both Before and After
<data:post.body/> tag then it will appear at the both top and bottom of the postDrop Your Comments :)
How to Add Official Twitter Follow Button to Blogger Blog
Twitter Follow Button is Twitter Official button released, and is very similar to Retweet button but here it is Follow button with Single Click to follow on Twitter. there is another options included to show the Number of Followers in our Twitter accounts. The Button Comes with 9 Languages.
Demo :-
On Light Background
On Dark Background
How to Add Twitter Follow Button
1. First Go to This Page2. There you will see a Form for you. Fill it with Required data!
3. on right side, Copy the Widget Code
Add it On Blogger Sidebar
a. Login to Blogger Dashboard > Design Tab > Page Elementsb. click Add a Gadget on Sidebar
c. Choose HTML/JavaScript, Paste the Copied code and Save it!
Add it On Blogger Posts
a. Login to Blogger Dashboard > Design Tab > Edit HTMLb. Click on Expand Template Widgets checkbox
Find for
<data:post.body/> tagc. Paste the Coppied Code Before or After it! and Save your Template.
- if you put the code Before
<data:post.body/> tag then it will appear at the top of the post - if you put the code After
<data:post.body/> tag then it will appear at the Bottom of the postHow to Display Scripts and Codes in Blogger Posts
How to display the Scripts and Codes in blogger post To show codes in blogger post in special section.
Suppose we want to show a simple code like bellow
<h1> Related posts </h1>
but it is HTML Code so it will display like bellow
Related posts
To avoid this we show codes in special Section amd make it friendly to post
Just follow these steps
- Login to Blogger dashboard
- Go to Design Section
- Then select Edit HTML tab
- Find ]]</b:skin> tag
- Replace it with Bellow Code of section
.codeview {
margin : 15px 15px 15px 35px;

padding : 10px;
clear : both;
font-size:normal;

list-style-type : none;
font-family : "Courier New", "MS Sans Serif", sans-serif, serif;

background: url('https://blogger.googleusercontent.com/img/b/R29vZ2xl/AVvXsEi7en6RmEl-uwvFI8LCk54q-WYhsmyFFYwnRr50T3HXH3HWnKvI-hlRrI0jazuRj-Y0QLEN9VcpTNVgwQBmzNWGh_f07tzr7M0fnCQmmfejzaUM5Ny8WVySQeLgN8oEHmeM-qGk9QwQNrhH/') no-repeat scroll bottom right #EFFBF5;
border-top : 1px solid #eeeeee;

border-right : 2px solid #cccccc;
border-bottom : 2px solid #cccccc;

border-left : 1px solid #eeeeee;
}
.codeview li {
font-size : 13px;

line-height : 24px;
color : #333333;
font-weight : normal;

margin : 0;
padding : 0;
}
]]></b:skin>
Now save your template.
While creating any Post, If you want to show the special Code in post that CSS code or JavaScript code, what ever may be , Go to Edit HTML tab in Post and create Div section and put your code in Div section like bellow and publish Your Post
<div class="codeview">
</div>Note:- Before Putting code, Make it Friendly to post Using these tools
a sample preview
.codeview {
margin : 15px 15px 15px 35px;
padding : 10px;
clear : both;
font-size:normal;
list-style-type : none;
font-family : "Courier New", "MS Sans Serif", sans-serif, serif;
background: url('https://blogger.googleusercontent.com/img/b/R29vZ2xl/AVvXsEi7en6RmEl-uwvFI8LCk54q-WYhsmyFFYwnRr50T3HXH3HWnKvI-hlRrI0jazuRj-Y0QLEN9VcpTNVgwQBmzNWGh_f07tzr7M0fnCQmmfejzaUM5Ny8WVySQeLgN8oEHmeM-qGk9QwQNrhH/') no-repeat scroll bottom right #EFFBF5;
border-top : 1px solid #eeeeee;
border-right : 2px solid #cccccc;
border-bottom : 2px solid #cccccc;
border-left : 1px solid #eeeeee;
}
.codeview li {
font-size : 13px;
line-height : 24px;
color : #333333;
font-weight : normal;
margin : 0;
padding : 0;
}
Want any Help Ask me via comments and leave your responses
How To Add Animated Flying Twitter Bird Widget For Blogger / Blogspot
Animated Flying Twitter Bird Widget For Blogger. The bird flying animated effect by JavaScript Hack and when you scroll the page Up or Down, twitter bird will come in front of your page. The bird found itself as the "follow me" link on the Twitter account. If you move the mouse pointer over the bird, a "follow me" button and a "tweet this" button displayed. Based on Tweet this link I am divided this widget into Two types.
1.Tweet this Button with Unique tweet text in all your Blog pages {i.e, tweet text contains That you have Chosen}
2.Tweet this Button with Multiple tweet text in All Your Posts Pages{i.e, tweet text contains your Post title and Post Url}
How to Install this Widget On Your Blog?
Flying Twitter Bird For all Blog Pages
- Fill the Following form with Required Data
- Click On Generate Button and Finally Click on Add to Blogger Button to add this widget on your Blog
Flying Twitter Bird For all Blog Post Pages
- Change Your Twitter Account User Name.
- Copy The Bellow Widget Code.
- Go to Blogger Dashboard > Design > Edit HTML .
- Check Expand Widgets Check Box. (i.e, Tick Expand Widgets)
- Search For <data:post.body/> tag and Place Widget Code Just After it.
- Save your template now.
<b:if cond='data:blog.pageType == "item"'>
<script type="text/javascript" src="http://bloggerblogwidgets.googlecode.com/files/way2blogging.org-tripleflap.js">
</script>
<script type="text/javascript">
var twitterAccount = "way2blogging";
var tweetThisText = " <data:post.title/> ~ <data:post.Url/> ";
tripleflapInit();
</script>
<noscript>
<span style="font-size:11px;margin:10px;">
Flying Twitter Bird Widget By <a href="http://www.way2blogging.org">way2blogging.org</a>
</span>
</noscript>
</b:if>Want any help about this ?, Contact me Via Comments Or Contact Us
Add Animated Flying Twitter Bird Widget to Blogger Blogs (Updated)
Flying Twitter Bird widgets for blogger, in my previous post i give this awesome widget and i am getting spectacular response from you. previously, the twitter bird has two types based on tweet text.
one is unique tweet text that you choose like "Blogger Widgets and Tricks - http://www.way2blogging.org" for all pages
and Second one is tweet text contains post title and post url, just like "How To Add Animated Flying Twitter Bird Widget For Blogger / Blogspot - http://www.way2blogging.org/2011/01/how-to-add-animated-flying-twitter-bird.html"
Now i am giving another type, that is tweet text contains Current page title and Url, and is visible in all pages of your blog, for suppose you are in label page then the tweet text contains Label Name and URL
How to Install?
is Very Simple! just follow these steps...- Change Your Twitter Account User Name.
- Copy The Bellow Widget Code.
- Go to Blogger Dashboard > Design > Edit HTML .
- Search For </body> tag and Place Widget Code Just Before it.
- Save your template.
<!-- Twitter Bird Widget for Blogger by Way2blogging.org -->
<script type="text/javascript" src="http://bloggerblogwidgets.googlecode.com/files/way2blogging.org-tripleflap.js">
</script>

<script type="text/javascript">
 var twitterAccount = "way2blogging";
 var tweetThisText = " <data:blog.pageTitle/> : <data:blog.url/> ";
 tripleflapInit();

</script>
<span style="font-size:11px;position:absolute;"><a title='Blogger Widget by Way2blogging.Org' href="http://www.way2blogging.org" target='_blank'>Blogger Widgets</a></span>

<!-- Twitter Bird Widget for Blogger by Way2blogging.org -->
That's All!
How To Add Tweet this (Twitter) button to Each Blogger Post
Hi friends “Tweet this” button will enable your readers to share your post with other Twitter users. This will help promote your blog and possibly increase your Twitter followers.
This button will appear at the bottom area of each post.
How to add Tweet this button to each blogger post:-
Note:Backup your template first
- Login to your to your Blogger account.
- Go to Dashboard > Design > Edit HTML.
- Check Expand Widgets (i.e, Tick it)
- Search bellow Tag
<data:post.body/><b:if cond='data:blog.pageType == "item"'>
<br/><a expr:href='"http://twitter.com/home?status=Read - " + data:post.title + "-" + data:post.url' title='Post this article on Twitter' target='_blank'><img style="border:0px;" src='http://i46.tinypic.com/2py4aw8.jpg'/></a>
</b:if>Save your template and test it once for good working or not
#You can change tweet this button with yours
Click here to download more tweet this buttons
How to Add Wordle Type Flash Label Cloud (FatColud) Widget For Blogger / Blogspot
Hi! Firstly, I wishing You a very Happy New Year. Yes,a new blogger widget in front of you. Have you seen Wordle word Cloud? This widget is similar to Wordle word cloud called as FatCloud. With this widget You can show your labels as wordle word cloud in Different formats. This Widget is Flash based and it Generates Label Cloud(FatCloud) automatically.
It includes Different types of Fonts, Differenttypes of text Angle and Color Schemes with Custom design also, so that you can Design your Label Cloud differently
I include all options in this widget. See a screen-shot bellow
More screen shots for You
Screen Shot 1, Screen shot 2, Screen Shot 3, Screen Shot 4, Screen Shot 5, Screen Shot 6, Screen Shot 7
: Backup Your Full Template First!
How to Add This Widget to Blogger?
- Login to Blogger Account
- Go to Design > Edit Html
- Search for Bellow Code of Section (Without checking of Expand Widgets Checkbox)
<b:section class='sidebar' id='sidebar' preferred='yes'>Above code is not visible in all templates because of change in Class or Id. For suppose If a template having two sidebars of Right and Left, then Class or Id is changed to sidebar-left ,sidebar-right, sidebar-wrapper-left and like so...
So please make sure before Searching above code
And Finally add Generated Widget Code just After it And Save your template
Want any Help regarding this widget?, Then Contact me via Comments or Click here
Please leave your Comments and Responses bellow
This Article is licensed under a Creative Commons Attribution-NonCommercial-ShareAlike 2.5 India License.
Flash Animated Label Cloud Widget For Blogger - Blogspot
Flash Animated Label Cloud Widget(Blogumus) for blogger was awesome widget to show blogger labels in alternatively. This widget is Designed for Word Press, and Now it is available for Blogger.
With this widget we access label tags randomly by your mouse over the Flash object to see the animation begin, the labels are animated around Sphere. I am giving highly customized options for this widget.
I think Using & installing this widget very easily for You. Take a look of this Widget
Now I will Explain How to Use this widget for blogger
Note:- Back Up Your Template before Going to do this for safety
First Customize values bellow and Generate Widget Code
Login to Blogger account
Goto Design section > Edit HTML
Search Bellow Tag
<b:section class='sidebar' id='sidebar' preferred='yes'>Add Generated Widget Code Just after it
Now save your template And check your blog
Video Tutorial : How to Install Flash Animated Label Cloud Widget on Blogger Blog ?
Any difficult to use or install this widget You can surely contact via Comments or Contact US For Help
How to Add Facebook Share Count Buttons to Blogger Blogs
Hello Friends! Today i going to teach you how to add different types Facebook share count buttons to blogger blog. i think all you know about share count buttons. I am not added any tutorial about Facebook and i will give you some more cool widget for promote Facebook.
How to Add Facebook Share Count Buttons
here, i am giving a code generator form.You just add it in simple 4 easy Steps.
First : Generate widget code using below form.
Second : Go to Blogger Dashboard > Design > Edit HTML
Third : Click on Expand Template Widgets checkbox and Search for <data:post.body/>
Fourth : Place the Copied Widget code Before or After it!
- if you put the code Before <data:post.body/> tag then it will appear at the top of the post
- if you put the code After <data:post.body/> tag then it will appear at the Bottom of the post
How to Add Retweet Button to Each Blogger Post
Add retweet button to each Blogger post, Retweet button for blogs and websites which enables easily tweet their content on twitter. If you have useful content in your blog, other twitter users retweet your content to their twitter will increase your blog traffic also.
Tweeting of blog post to twitter as your post content with URL of post. These buttons make tiny your URLs. I am giving all collections of retweet buttons
How to add Retweet Button to Blogger Post:-
- Login to Blggger Dashbord
- Go to Design section
- Select Edit HTML
- Check Expand Widgets (i.e, Tick Expand widgets)
- Find <data:post.body/> tag
- Paste Bellow Code Before it
<b:if cond='data:blog.pageType == "item"'>
<div style='float:right; margin-left:10px;'>
</div>
</b:if>Here is giving different types of Retweet buttons with Codes
Grab any one code that you like and Replace it
with in Above.
Save Your Template
For Further Help you can Contact me via Comments.
| |
| |
| |
| |
| |
| |
| |
| |
| |
| |
| |
| |
| |
| |
| |
| |
| |
| |
| |
| |
| |
| |
| |
| |
| |
| |
| |
| |
| |
| |
| |
| |
| |
| |
| |
? Retweet | |
? Retweet | |
Add Social Sharing/Bookmarking Widget with Cool Hover Effect
Social sharing / bookmarking widget with Cool Gray-scale/Color hover widget to Blogger blog. i have given a beautiful sharing widget with css/jquery. This widget is used by me in way2blogging.blogspot.com with CSS. After moving to .Org domain name, i change the Template.
Here i am giving that widget and added a cool hover effect with CSS3 for you. If you like it then you can use in your blog :)
Live Demo:-
How to Install Social Sharing/Bookmarking Widget?
Step 1: Adding Css code1. Login to Blogger Dashboard > Design tab > Edit Html
2. Click on Expand Template widgets ckeckbox
3. Search for
]]></b:skin> tag and put below code above it! #w2b-share ul {list-style: none;clear: none;padding: 0px 0px ;margin: 5px 0;}
#w2b-share ul li {display: inline;background:none;margin:0;padding:0;}
#w2b-share ul li a {display: block;float: left;width: 32px;height:32px;background-image: url('https://blogger.googleusercontent.com/img/b/R29vZ2xl/AVvXsEhMlCsJqIzwRcuumroFhDc5ZPII3iKQGhu17ZGIlvJ-WXwOdJU9MpKVFS7x6oEYyG4_6ZiVA47Rzb9ZlKPL6M0kmf7Uzo_p1buUxY96Ew0xA7H7xE8GZUD-XDB5PdL3HhPPaIBUm1qwCJge/') ;margin-left:3px;background-repeat: no-repeat;margin-right: 2px;-moz-transition: all 0.3s ease;-o-transition: all 0.3s ease; -webkit-transition: all 0.3s ease; -ms-transition: all 0.3s ease; transition: all 0.3s ease; }
#w2b-share ul li a.twitter {background-position: -0px -0px; }
#w2b-share ul li a.twitter:hover {background-position: -0px -33px; }
#w2b-share ul li a.facebook {background-position: -32px -0px; }
#w2b-share ul li a.facebook:hover {background-position: -32px -33px; }
#w2b-share ul li a.stumbleupon {background-position: -64px -0px; }
#w2b-share ul li a.stumbleupon:hover{background-position: -64px -33px; }
#w2b-share ul li a.digg {background-position: -192px -0px; }
#w2b-share ul li a.digg:hover {background-position: -192px -33px;}
#w2b-share ul li a.reddit {background-position: -160px -0px; }
#w2b-share ul li a.reddit:hover {background-position: -160px -33px;}
#w2b-share ul li a.google {background-position: -128px -0px; }
#w2b-share ul li a.google:hover {background-position: -128px -33px;}
#w2b-share ul li a.del-icio-us {background-position: -480px -0px; }
#w2b-share ul li a.del-icio-us:hover{background-position: -480px -33px;}
#w2b-share ul li a.mixx {background-position: -96px -0px; }
#w2b-share ul li a.mixx:hover {background-position: -96px -33px; }
#w2b-share ul li a.technorati {background-position: -416px -0px; }
#w2b-share ul li a.technorati:hover {background-position: -416px -33px;}
#w2b-share ul li a.linkin {background-position: -256px -0px; }
#w2b-share ul li a.linkin:hover {background-position: -256px -33px;}
#w2b-share ul li a.yahoobuzz {background-position: -448px -0px; }
#w2b-share ul li a.yahoobuzz:hover {background-position: -448px -33px;}
#w2b-share ul li a.myspace {background-position: -512px -0px; }
#w2b-share ul li a.myspace:hover {background-position: -512px -33px;}
#w2b-share ul li a.more {background-position: -576px -0px; }
#w2b-share ul li a.more:hover {background-position: -576px -33px;}Step 2: Adding Widget Code
1. Search for
<data:post.body/> tag 2. And Put Below Code immediately after it! & Save your Template
<b:if cond='data:blog.pageType == "item"'>
<div id='w2b-share'>
<ul>
<li><a class='twitter' expr:href='"http://twitter.com/?status=" + data:post.title + " - " + data:post.url ' rel='nofollow' target='_blank' title='Share this post on twitter'/></li>
<li><a class='facebook' expr:href='"http://www.facebook.com/sharer.php?u=" + data:post.url + "&title=" + data:post.title' rel='nofollow' target='_blank' title='Share this post on Facebook'/></li>
<li><a class='stumbleupon' expr:href='" http://www.stumbleupon.com/submit?url=" + data:post.url + "&title=" + data:post.title' rel='nofollow' target='_blank' title='Share this post on Stunbleupon'/></li>
<li><a class='digg' expr:href='"http://digg.com/submit?url=" + data:post.url + "&title=" + data:post.title' rel='nofollow' target='_blank' title='Share this post on Digg'/></li>
<li><a class='reddit' expr:href='" http://www.reddit.com/submit?url=" + data:post.url + "&title=" + data:post.title' rel='nofollow' target='_blank' title='Share this post on Reddit'/></li>
<li><a class='google' expr:href='"http://www.google.com/bookmarks/mark?op=add&bkmk=" + data:post.url + "&title=" + data:post.title' rel='nofollow' target='_blank' title='Bookmark this post on Google'/></li>
<li><a class='del-icio-us' expr:href='"http://del.icio.us/post?url=" + data:post.url + "&title=" + data:post.title' rel='nofollow' target='_blank' title='Share this post on delicious'/></li>
<li><a class='mixx' expr:href='"http://www.mixx.com/submit?page_url=" + data:post.url + "&title=" + data:post.title ' rel='nofollow' target='_blank' title='Share this post on Mixx'/></li>
<li><a class='technorati' expr:href='" http://technorati.com/faves?add=" + data:post.url + "&title=" + data:post.title' rel='nofollow' target='_blank' title='Fav on Technorati'/></li>
<li><a class='yahoobuzz' expr:href='"http://buzz.yahoo.com/submit/?url="+ data:post.url' rel='nofollow' target='_blank' title='Share this post on Yahoo!Buzz'/></li>
<li><a class='myspace' expr:href='"http://www.myspace.com/Modules/PostTo/Pages/?u="+ data:post.url + "&t=" + data:post.title' rel='nofollow' target='_blank' title='Sahre this post on Myspace'/></li>
<li><a class='a2a_dd more' expr:href='"http://www.addtoany.com/share_save?url=" + data:post.url + "&title=" + data:post.title '/><script src='http://static.addtoany.com/menu/page.js' type='text/javascript'/></li>
</ul>
</div>
</b:if>Solution For Finding Code In Step 2
here i received a comment While finding the<data:post.body/> code is coming three time This Problem comes when we install Auto Read Hack in our Blogs
For this Problem Search for any one line from below and Put Above Section of Wdget Code after it!
<div class='post-footer-line post-footer-line-1'><div class='post-footer'><b:if cond='data:blog.pageType == "item"'>
<data:post.body/>Thank you for All your Info & Support
Add Sexy Auto Hide Social Bookmarking Widget for Blogger
How to add sexy auto hide Social bookmarking widget, using this widget your readers share or bookmark the post on several social networking sites. This is also increases SEO by sharing. it is embedded bellow on each and every post page so that ease in using.
How to add this widget to Blogger:-
Note:- BackUp your template First- Login to Blogger account
- Go to Design > Edit HTML
- Check Expand Widgets (i.e, Tick Expand Widgets)
- Search this ]]></b:skin> tag
- Add bellow CSS code before it
div.sexy-bookmarks { height:54px; background:url('https://blogger.googleusercontent.com/img/b/R29vZ2xl/AVvXsEght6EvAOPsxhXloyxW9IVRT7BaGT4TrL5fqYuvtT2z44tt4GvRX0NG_Jk0WRS1udtJIUBDBHvGCunn_vM66RrpyI7SO3Puil3vUK8oV_M0-W2w2g0_96ia-NwA88XKz03gQ4z8G3yx6bYd/') no-repeat left bottom; position:relative; width:540px; }

div.sexy-bookmarks span.sexy-rightside { width:17px; height:54px; background:url('https://blogger.googleusercontent.com/img/b/R29vZ2xl/AVvXsEght6EvAOPsxhXloyxW9IVRT7BaGT4TrL5fqYuvtT2z44tt4GvRX0NG_Jk0WRS1udtJIUBDBHvGCunn_vM66RrpyI7SO3Puil3vUK8oV_M0-W2w2g0_96ia-NwA88XKz03gQ4z8G3yx6bYd/') no-repeat right bottom; position:absolute; right:-17px; }

div.sexy-bookmarks ul.socials { margin:0 !important; padding:0 !important; position:absolute; bottom:0; left:10px; }

div.sexy-bookmarks ul.socials li { display:inline-block !important; float:left !important; list-style-type:none !important; margin:0 !important; height:29px !important; width:48px !important; cursor:pointer !important; padding:0 !important; }

div.sexy-bookmarks ul.socials a { display:block !important; width:48px !important; height:29px !important; font-size:0 !important; color:transparent !important; }

.sexy-furl, .sexy-furl:hover,
.sexy-digg, .sexy-digg:hover,
.sexy-reddit, .sexy-reddit:hover,
.sexy-stumble, .sexy-stumble:hover,

.sexy-delicious, .sexy-delicious:hover,
.sexy-yahoo, .sexy-yahoo:hover,
.sexy-blinklist, .sexy-blinklist:hover,
.sexy-technorati, .sexy-technorati:hover,

.sexy-facebook, .sexy-facebook:hover,
.sexy-twitter, .sexy-twitter:hover,
.sexy-myspace, .sexy-myspace:hover,
.sexy-mixx, .sexy-mixx:hover,

.sexy-script-style, .sexy-script-style:hover,
.sexy-designfloat, .sexy-designfloat:hover,
.sexy-syndicate, .sexy-syndicate:hover,
.sexy-email, .sexy-email:hover { background:url('https://blogger.googleusercontent.com/img/b/R29vZ2xl/AVvXsEilN6qY5VZKHoLiUWBk_o6GVha59OBzZxRAY6Z1s5SpYmr0-KkCRTOVv6GBp2WdkZuGWXfmO127HVwpq0jYFQvF52x7Aop6ykIKiMI1KOVdoBPHa75bbPhVm1JSKkdHefWuF9K1ZlvlDjPV/') no-repeat !important; }

.sexy-furl { background-position:-300px top !important; }
.sexy-furl:hover { background-position:-300px bottom !important; }

.sexy-digg { background-position:-500px top !important; }
.sexy-digg:hover { background-position:-500px bottom !important; }

.sexy-reddit { background-position:-100px top !important; }
.sexy-reddit:hover { background-position:-100px bottom !important; }

.sexy-stumble { background-position:-50px top !important; }
.sexy-stumble:hover { background-position:-50px bottom !important; }

.sexy-delicious { background-position:left top !important; }
.sexy-delicious:hover { background-position:left bottom !important; }

.sexy-yahoo { background-position:-650px top !important; }
.sexy-yahoo:hover { background-position:-650px bottom !important; }

.sexy-blinklist { background-position:-600px top !important; }
.sexy-blinklist:hover { background-position:-600px bottom !important; }

.sexy-technorati { background-position:-700px top !important; }
.sexy-technorati:hover { background-position:-700px bottom !important; }

.sexy-myspace { background-position:-200px top !important; }
.sexy-myspace:hover { background-position:-200px bottom !important; }

.sexy-twitter { background-position:-350px top !important; }
.sexy-twitter:hover { background-position:-350px bottom !important; }

.sexy-facebook { background-position:-450px top !important; }
.sexy-facebook:hover { background-position:-450px bottom !important; }

.sexy-mixx { background-position:-250px top !important; }
.sexy-mixx:hover { background-position:-250px bottom !important; }

.sexy-script-style { background-position:-400px top !important; }
.sexy-script-style:hover { background-position:-400px bottom !important; }

.sexy-designfloat { background-position:-550px top !important; }
.sexy-designfloat:hover { background-position:-550px bottom !important; }

.sexy-syndicate { background-position:-150px top !important; }
.sexy-syndicate:hover { background-position:-150px bottom !important; }

.sexy-email { background-position:-753px top !important; }
.sexy-email:hover { background-position:-753px bottom !important; } <div class='sexy-bookmarks'>
<ul class='socials'>
<li class='sexy-delicious'><a expr:href='"http://del.icio.us/post?url=" + data:post.url + "&title=" + data:post.title' target='_blank' title='Add to Delicious' rel='nofollow'/></li>
<li class='sexy-digg'><a expr:href='" http://digg.com/submit?url=" + data:post.url + "&title=" + data:post.title' target='_blank' title='Digg This Post' rel='nofollow'/></li>
<li class='sexy-technorati'><a expr:href='" http://technorati.com/faves?add=" + data:post.url + "&title=" + data:post.title' target='_blank' title='Add to Technorati' rel='nofollow'/></li>
<li class='sexy-reddit'><a expr:href='" http://www.reddit.com/submit?url=" + data:post.url + "&title=" + data:post.title' target='_blank' title='Add to Reddit' rel='nofollow'/></li>
<li class='sexy-stumble'><a expr:href='" http://www.stumbleupon.com/submit?url=" + data:post.url + "&title=" + data:post.title' target='_blank' title='Stumble This Post' rel='nofollow'/></li>
<li class='sexy-designfloat'><a expr:href='"http://www.designfloat.com/submit.php?url=" + data:post.url + "&title=" + data:post.title' target='_blank' title='Share on DesignFloat' rel='nofollow'/></li>
<li class='sexy-facebook'><a expr:href='" http://www.facebook.com/sharer.php?u=" + data:post.url + "&title=" + data:post.title' target='_blank' title='Share on Facebook' rel='nofollow'/></li>
<li class='sexy-twitter'><a expr:href='" http://twitthis.com/twit?url=" + data:post.url + "&title=" + data:post.title' target='_blank' title='Share on Twitter' rel='nofollow'/></li>
<li class='sexy-furl'><a expr:href='" http://www.furl.net/storeIt.jsp?u=" + data:post.url + "&title=" + data:post.title' target='_blank' title='Share on Furl' rel='nofollow'/></li>
<li class='sexy-syndicate'><a href='http://feeds2.feedburner.com/WAY2BLOGGING' title='Subscribe to RSS' rel='nofollow'/></li>
<li class='sexy-email'><a expr:href='" mailto:?subject=" + data:post.url + "&title=" + data:post.title' target='_blank' title='Share on Email' rel='nofollow'/></li>
</ul>
<span class='sexy-rightside'/>
</div>*Note:- Change your Feedburner URL(http://feeds2.feedburner.com/WAY2BLOGGING) with Yours
Save your template
Further Changes: If you want to show this widget only on post page then add bellow code
<b:if cond='data:blog.pageType == "item"'>
<!-- Put Above Widget Code here -->
</b:if >These Conditional tag will allow this widget only on post page to show.
Now You are Done!
Add Yahoo Smiley Emoticons Above Blogger / BlogSpot Comment Form
Yahoo smileys on blogger comments. Yahoo smileys are Now available in blogger comments. Using with a simple JavaScript Hack, smiley characters are replaced with Yahoo Smiley images. I used yahoo smileys in Yahoo emotions site and implemented this script. I changed some smiley characters for our requirement. You can try this in bellow comments form.
Add Yahoo! smileys On Blogger Comments
There are three simple steps in this...1.Adding CSS Code
2.Adding Html Code
3.Adding Javascript
Adding CSS Code
a. Go to Blogger Dashbord > Design > Edit HTML b. Click on Expand Widgets tick box
c. Search for
]]></b:skin> tag and add bellow code before It..way2bloggingcsmly {
background: none repeat scroll 0 0 #EFF5FB !important;
border: 1px dashed green !important;
font-size: medium !important;
padding: 5px !important;
text-align: left !important;
font-weight:bold !important;
width:100% !important;
-moz-background-clip: -moz-initial;
-moz-background-origin: -moz-initial;
-moz-background-inline-policy: -moz-initial;
}
img.w2bsmly {
height: auto !important;
vertical-align: middle !important;
width: auto !important;
border:0px !important;
}Adding Html Code
a. Search for bellow two tags<b:if cond='data:post.embedCommentForm'>
<b:include data='post' name='comment-form'/><div class="way2bloggingcsmly">
<img src="http://l.yimg.com/us.yimg.com/i/mesg/emoticons7/1.gif" alt="" class="w2bsmly"/> :)
<img src="http://l.yimg.com/us.yimg.com/i/mesg/emoticons7/2.gif" alt="" class="w2bsmly"/> :(
<img src="http://l.yimg.com/us.yimg.com/i/mesg/emoticons7/3.gif" alt="" class="w2bsmly"/> ;)
<img src="http://l.yimg.com/us.yimg.com/i/mesg/emoticons7/4.gif" alt="" class="w2bsmly"/> :D
<img src="http://l.yimg.com/us.yimg.com/i/mesg/emoticons7/5.gif" alt="" class="w2bsmly"/> ;;-)
<img src="http://l.yimg.com/us.yimg.com/i/mesg/emoticons7/7.gif" alt="" class="w2bsmly"/> :-/
<img src="http://l.yimg.com/us.yimg.com/i/mesg/emoticons7/8.gif" alt="" class="w2bsmly"/> :x
<img src="http://l.yimg.com/us.yimg.com/i/mesg/emoticons7/10.gif" alt="" class="w2bsmly"/> :P
<img src="http://l.yimg.com/us.yimg.com/i/mesg/emoticons7/11.gif" alt="" class="w2bsmly"/> :-*
<img src="http://l.yimg.com/us.yimg.com/i/mesg/emoticons7/12.gif" alt="" class="w2bsmly"/> =((
<img src="http://l.yimg.com/us.yimg.com/i/mesg/emoticons7/13.gif" alt="" class="w2bsmly"/> :-O
<img src="http://l.yimg.com/us.yimg.com/i/mesg/emoticons7/14.gif" alt="" class="w2bsmly"/> X(
<img src="http://l.yimg.com/us.yimg.com/i/mesg/emoticons7/15.gif" alt="" class="w2bsmly"/> :7
<img src="http://l.yimg.com/us.yimg.com/i/mesg/emoticons7/16.gif" alt="" class="w2bsmly"/> B-)
<img src="http://l.yimg.com/us.yimg.com/i/mesg/emoticons7/17.gif" alt="" class="w2bsmly"/> :-S
<img src="http://l.yimg.com/us.yimg.com/i/mesg/emoticons7/18.gif" alt="" class="w2bsmly"/> #:-S
<img src="http://l.yimg.com/us.yimg.com/i/mesg/emoticons7/19.gif" alt="" class="w2bsmly"/> 7:)
<img src="http://l.yimg.com/us.yimg.com/i/mesg/emoticons7/20.gif" alt="" class="w2bsmly"/> :((
<img src="http://l.yimg.com/us.yimg.com/i/mesg/emoticons7/21.gif" alt="" class="w2bsmly"/> :))
<img src="http://l.yimg.com/us.yimg.com/i/mesg/emoticons7/22.gif" alt="" class="w2bsmly"/> :|
<img src="http://l.yimg.com/us.yimg.com/i/mesg/emoticons7/23.gif" alt="" class="w2bsmly"/> /:)
<img src="http://l.yimg.com/us.yimg.com/i/mesg/emoticons7/24.gif" alt="" class="w2bsmly"/> =))
<img src="http://l.yimg.com/us.yimg.com/i/mesg/emoticons7/25.gif" alt="" class="w2bsmly"/> O:-)
<img src="http://l.yimg.com/us.yimg.com/i/mesg/emoticons7/26.gif" alt="" class="w2bsmly"/> :-B
<img src="http://l.yimg.com/us.yimg.com/i/mesg/emoticons7/27.gif" alt="" class="w2bsmly"/> =;
<img src="http://l.yimg.com/us.yimg.com/i/mesg/emoticons7/101.gif" alt="" class="w2bsmly"/> :-c
<img src="http://l.yimg.com/us.yimg.com/i/mesg/emoticons7/100.gif" alt="" class="w2bsmly"/> :)]
<img src="http://l.yimg.com/us.yimg.com/i/mesg/emoticons7/102.gif" alt="" class="w2bsmly"/> ~X(
<img src="http://l.yimg.com/us.yimg.com/i/mesg/emoticons7/103.gif" alt="" class="w2bsmly"/> :-h
<img src="http://l.yimg.com/us.yimg.com/i/mesg/emoticons7/104.gif" alt="" class="w2bsmly"/> :-t
<img src="http://l.yimg.com/us.yimg.com/i/mesg/emoticons7/105.gif" alt="" class="w2bsmly"/> 8-7
<img src="http://l.yimg.com/us.yimg.com/i/mesg/emoticons7/28.gif" alt="" class="w2bsmly"/> I-)
<img src="http://l.yimg.com/us.yimg.com/i/mesg/emoticons7/29.gif" alt="" class="w2bsmly"/> 8-|
<img src="http://l.yimg.com/us.yimg.com/i/mesg/emoticons7/29.gif" alt="" class="w2bsmly"/> L-)
<img src="http://l.yimg.com/us.yimg.com/i/mesg/emoticons7/31.gif" alt="" class="w2bsmly"/> :-a
<img src="http://l.yimg.com/us.yimg.com/i/mesg/emoticons7/32.gif" alt="" class="w2bsmly"/> :-$
<img src="http://l.yimg.com/us.yimg.com/i/mesg/emoticons7/33.gif" alt="" class="w2bsmly"/> [-(
<img src="http://l.yimg.com/us.yimg.com/i/mesg/emoticons7/34.gif" alt="" class="w2bsmly"/> :O)
<img src="http://l.yimg.com/us.yimg.com/i/mesg/emoticons7/35.gif" alt="" class="w2bsmly"/> 8-}
<img src="http://l.yimg.com/us.yimg.com/i/mesg/emoticons7/36.gif" alt="" class="w2bsmly"/> 2:-P
<img src="http://l.yimg.com/us.yimg.com/i/mesg/emoticons7/37.gif" alt="" class="w2bsmly"/> (:|
<img src="http://l.yimg.com/us.yimg.com/i/mesg/emoticons7/38.gif" alt="" class="w2bsmly"/> =P~
<img src="http://l.yimg.com/us.yimg.com/i/mesg/emoticons7/39.gif" alt="" class="w2bsmly"/> :-?
<img src="http://l.yimg.com/us.yimg.com/i/mesg/emoticons7/40.gif" alt="" class="w2bsmly"/> #-o
<img src="http://l.yimg.com/us.yimg.com/i/mesg/emoticons7/41.gif" alt="" class="w2bsmly"/> =D7
<img src="http://l.yimg.com/us.yimg.com/i/mesg/emoticons7/42.gif" alt="" class="w2bsmly"/> :-SS
<img src="http://l.yimg.com/us.yimg.com/i/mesg/emoticons7/43.gif" alt="" class="w2bsmly"/> @-)
<img src="http://l.yimg.com/us.yimg.com/i/mesg/emoticons7/44.gif" alt="" class="w2bsmly"/> :^o
<img src="http://l.yimg.com/us.yimg.com/i/mesg/emoticons7/45.gif" alt="" class="w2bsmly"/> :-w
<img src="http://l.yimg.com/us.yimg.com/i/mesg/emoticons7/47.gif" alt="" class="w2bsmly"/> 7:P
<img src="http://l.yimg.com/us.yimg.com/i/mesg/emoticons7/48.gif" alt="" class="w2bsmly"/> 2):)
<img src="http://l.yimg.com/us.yimg.com/i/mesg/emoticons7/109.gif" alt="" class="w2bsmly"/> X_X
<img src="http://l.yimg.com/us.yimg.com/i/mesg/emoticons7/110.gif" alt="" class="w2bsmly"/> :!!
<img src="http://l.yimg.com/us.yimg.com/i/mesg/emoticons7/111.gif" alt="" class="w2bsmly"/> \m/
<img src="http://l.yimg.com/us.yimg.com/i/mesg/emoticons7/112.gif" alt="" class="w2bsmly"/> :-q
<img src="http://l.yimg.com/us.yimg.com/i/mesg/emoticons7/113.gif" alt="" class="w2bsmly"/> :-bd
<img src="http://l.yimg.com/us.yimg.com/i/mesg/emoticons7/114.gif" alt="" class="w2bsmly"/> ^#(^
<img src="http://l.yimg.com/a/i/us/msg/emoticons/pirate_2.gif" alt="" class="w2bsmly"/> :ar!
<a href="http://www.way2blogging.org" target="_blank">
<img src="https://blogger.googleusercontent.com/img/b/R29vZ2xl/AVvXsEizVU8Yb-k-3__rRpJArcu8yih5p-7fTzKOaKMnJegwz9VX5Kq0CQBjYMBtMUAVWv1BYjbHAC_fO94LmUX59zgEiWAcSIzfFhtzslJFnl5htc_0HiLoR-8cWNusCv7cwEbheQU1Lr7_lioR/" border="0"/></a>
</div>
Adding JavaScript Code
a. Search for </body> tag place bellow code before it and Save Template.<script src='http://bloggerblogwidgets.googlecode.com/files/way2bloging-ysmileys-for-bloggercomments.js' type='text/javascript'></script>You are done!
How To Provide Code for Other Bloggers to Link to your Blog
Your blog will increase in Page Rank when more and more bloggers link to your blog. Hence to gain more backlinks to your blog provide code for others to copy and paste into their blog template.
You can provide code for only a simple link or for an image link. The advantage with a link is you can specify what anchor text you want in the link. The search engines place a lot of importance on anchor text for indexing blogs.
CODE FOR BUTTON LINK
To provide an image link you will first have to create a button image. Just Google for "button generator". Go to any of these sites and create a button image. Here is one I made for this site : After creating the button upload it to a free host like Photobucket.com or Googlepages and copy down the link to the image. Paste it in a Notepad file for inserting it into the code as shown below.
To put the code in your sidebar login at Blogger.com and click on Layout link on Dashboard. Then click on Add Page Element link at top of sidebar. Choose the Html/Javascript option and paste the following code in the contents window and save :
<p>To link to this blog, copy and paste the code below into your site.</p>
<textarea rows="4" cols="24" style="font-size: 1.1em;" readonly="readonly" onclick="this.select();"><a href="BLOG_URL"><img
src="LINK OF IMAGE" alt="BLOG_DESCRIPTION" /></a></textarea>
Replace the CAPS with the relevant data for your blog. For this blog it will look like this :
+++++++++++++++++++++++++++++++++++
To link to this blog, copy and paste the code below into your site.
++++++++++++++++++++++++++++++++++++
This will give an image link to your blog like this after a blogger pastes the above code in his blog.
++++++++++++++++++++++++++++++++++++
CODE FOR A TEXT LINK
The code for a text link is :
<p>To link to this blog, copy and paste the code below into your site.</p>
<textarea id="b_2" rows="4" cols="24" style="font-size: 1.1em;" readonly="readonly" onclick="this.select();"><a href="BLOG_URL">BLOG_TITLE</a></textarea>
Replace the CAPS with your Blog URL and Blog Title. It will look like this :
+++++++++++++++++++++++++++++++++
To link to this blog, copy and paste the code below into your site.
How to Host Your Blog Scripts and Files on DropBox for Free
In this Tutorial I show you How to Host your scripts and files online with a Direct hotlink to your files. till now we are using the Google sites, Google Code or some other Free host's like FileDen, OpenDrive, Fileave, RipWay etc,. These free hosts are Giving Good features but our need is Bandwidth(Data Transfer Limit). DropBox are Providing us with 2GB hosting with 10GB/Day Bandwidth, and also we can get direct hot link to your files by Public sharing.
DropBox allow us to Upload files on their Host in two ways
1. By Synchronizing your files via DropBox Software.2. By Online Uploading via DropBox site.
in this tutorial i will give you the Two ways, Step By Step.
Upload/Host your files via DropBox Software
Step 1: Download the DropBox Software form this Link, and Launch the DropBox Setup by Double Clicking the Installer.Step 2: Click Install button in DropBox Setup pop up window and Wait Until the software completes Installation.
Step 3: After Completing installation, DropBox Setup opens another popup window for account settings. if you not have DropBox account, then choose I don't have DropBox account and click Next Button.
Step 4: Fill the fields with Required data and Click Next button
Step 5: Choose 2 GB Free account and Click Next button
Step 6: Choose Typical settings and Click Install button
Step 7: a PopUp window opens for DropBox tour, click the Skip tour Button.
Step 8: Finally Click the Finish Button to Close the DropBox Setup.
Step 9: DropBox folder Opens automatically, If not then click the DropBox icon in the Taskbar.
Step 10: In DropBox folder open the Public folder, and paste your scripts or files in the Public folder.
Step 11: For getting Direct Link to you script or file, right click on the File --> go to DropBox --> Click the Copy Public Link
Your public links looks like
http://dl.dropbox.com/u/XXXXXXXX/style.cssUpload/Host your Files via Online
Step 1: Register a New account on DropBox site and Login to your accountStep 2: Click on Files tab --> Open the Public Folder by Clicking on Public.
Step 3: Click on Upload Button.
Step 4: an Inline Pop-Up window opens, click on Choose Files button.
Step 5: Select the Files that you want to Upload / Host and Click Open Button.
Step 6: Click Start Upload button to Upload your files
Step 7: After Completes Uploading, click the Uploaded file to open the Drop Menu options, and then Choose the Copy Public Link Option.
Step 8: Click the Copy to Clipboard button to copy the Direct Link to your Clipboard.
How To Host Javascript Or .js files on Blogger Itself
How To Host Javascript Or .js files on Blogger, yes as blogger supports javascript which makes blogger support all the possible hacks in this platform, where to host this javascript on blogger.The Problem we all face is getting an free server with unlimited bandwidth to host these javascripts. As blogger doesn't provide any source to host javascript for blog like it has provided picasa for images.As of before we all were using googlepages to upload the .js files but google closed this service and switched to google sites.As still we can upload these .js files to google sites but just upload it with file extension .txt instead of .js .OR we can upload .js files to Google Code
The best solution to host your javascript on blogger itself
For External Javascript the code is
<script src='http://Your-Script-Url/file.js' type='text/javascript'/>Whenever you are trying to implement some hack making use of javascript you would have mostly been asked to download the .js file and upload to your own server,get its url and then replace it with red link in above codes shown above,and then place the whole above codes in blogger html before closing of head tag.
So why don't we upload these javascripts to blogger itself.Just what you have to do is,whenever you are asked to do this kind of above stuff while implementing any hack.
Just use below code in place of above one.
<script type='text/javascript'>
//<![CDATA[
<--Paste all code here from .js file -->

//]]>
</script>
Just in place of "<--Paste all code here from .js file -->" line in above code what you have to do is just open the .js file (which you are asked to download or upload to your own server) in notepad or on your browser , copy its code and paste it in place of above red line.And your javascript codes are now ready which are now hosted on blogger itself instead of hosting to third party server.
Host your Image on Blogger for Free with Unlimited Bandwidth
Hosting your Images on Blogger with Unlimited Bandwidth for Free!. There are so many Free image hosting sites online.Some of the most popular sites include Imageshack, Photobucket, Tinypic, Flicker, Picasa, etc.. But they all have Limited Features, Like a Limited number of uploads, Image size Limits, Less Speed and especially bandwidth limits. Here, we are on the blogger platform, Blogger give free image hosting with unlimited bandwidth. All we need to know is how to upload the images to blogger.But some Bloggers are facing problems while getting the hotlink image URL to their images.This tutorial covers image uploads and will also be useful for some of my upcoming Great Tutorials.
How to Host your Image on Blogger?
here i am giving Step by Step process with Image Screen shots.Step 1: Login to Blogger Dashboard -> Click on NEWPOST button
Step 2: Click the Compose tab --> Click on Insert Image icon(
)Step 3: Click the Choose Files button
Step 4: Select the Files and Click the Open Button
Wait for a while till the image is finished uploading.
Step 5: Select the Uploaded image and Click the Add Selected button.
Step 6: Click on the Edit HTML tab
Step 7: you will see the two image Urls, but u pick Original image Url after the
href tag like below. Use the image any where you want with unlimited bandwidth.
If you upload the two or more images at once you will get the urls after the
href tag, but make sure the image name is different!this is a small tutorial about Blogger images upload and in upcoming tutorial i will give you the Most wanted tips and tricks about blogger images, those are very simple and every Blogger should must know it.